|
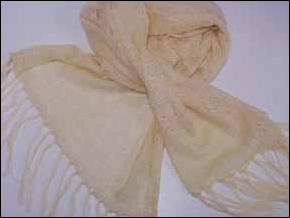
This scarf will made a quick, inexpensive but beautiful gift for any woman. It is so light and gauzy that it can be used in a variety of ways.
Size: 18" x 62" (46 x 158 cm) plus fringe.
Materials: 3.2 oz/92 g of Bramwell Silky; 100% acrylic (can substitute any 1-ply acrylic, rayon or silk yarn)
Machine: Sample knit on Brother 940 standard gauge.
Tension: 3 (should be a little loose)
Gauge: 8.4 sts x 14.6 rows (this is not important but the finished size may be different)
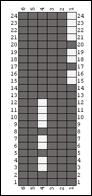
Pattern: Single bed tuck stitch – Stitch World #260; 6 st x 24 row repeat
Note to Singer punchcard knitters: try Card 11 and remember to pull the 2 stitches opposite the carriage to HP on each row so they will knit.
• Cast on over L75-R77 with waste yarn. Knit several inches of waste yarn for weight. Knit 1 row of ravel cord.
• COR, RC000. Crochet cast on with the main yarn. Knit 2 rows.
• COR. Make a row of eyelets by transferring L4, R3 and every 6th st in each direction to its neighbour; leave empty needles in work. (There will be more space on one edge than the other but it will not matter.) Knit 1 row.
• COL. Select the pattern (if using a Brother, set to KCI). Knit 1 row.
• COR, RC004. In tuck, knit 900 rows for 37.5 repeats. (To shorten or lengthen, remove or add 24 rows at a time.)
• COR, RC904. In stocking stitch, knit 1 row. Make a row of eyelets on the same needles as before.
• COL. Knit 3 rows. Knit 1 row at max. tension. Crochet bind off.
• Cut fringe to double your desired length plus an inch. With the ends as even as possible, fold the desired number of strands together (sample has 6). With a latch tool, pull the fold through an eyelet from the knit side and pull the ends through the fold to secure. Trim the fringes when all are finished.
• To get the wonderful silky look and feel to this scarf, iron the fabric well. Use an iron with a Teflon sole and set it to the silk setting with lots of steam. Have lines on the ironing board to help you keep the width consistent. With the tuck side up, iron carefully without a lot of pressure but with the iron gliding down on the fabric. Carefully unroll the edges and iron them in a straight line. Turn over and iron on the knit side as well.
© Eileen Montgomery 2000
|
|